Photography and Art

Thursday, December 24, 2009

Reflections on a Disk Crash

Humans have a terrible habit of learning things the hard way. As a seasoned IT professional and serious amateur photographer, you would think that I would have my files backed up to the hilt with both belt and suspenders to ensure recoverability. That would be sensible, but alas not human nature.

In late November, one of my disks crashed. It held about four years' worth of original photographs. I had been backing up my home computer using the Mozy Internet back-up service and got lulled into a false sense of security. Here's what I learned from the experience:

  • Mozy's recovery capabilities do work (thank goodness!), but restoring large amounts of data over the Internet takes time. It is still wise to use a local back-up for quick restores.
  • If you reconfigure your computer after it crashes (e.g. I upgraded my main hard disk to SSD and re-labeled some of my drive letters), you may cause issues with the back-up manifest files over on the Mozy side. This happened to me and it took a while for Mozy's customer service folks to get me fixed up. It caused a long hiatus in getting my back-ups rolling again.
  • When you re-create your new disk volumes prior to restoring your data, make sure Mozy back-up is turned off. If you accidentally run a back-up with no data, then Mozy creates a snap-shot of your file system that looks like you've deleted all your files. If you don't run a back-up for 31 days (see point 2 above), then Mozy starts to free up blocks of storage that you are no longer using. When you start backing up your files, you'll have to transfer the data all over again. For someone like me who has a lot of data, this means months of data transfer before your files are safely backed up again.

Here's what I'm doing now after learning my lesson:
  • I'm using a large external hard drive to run incremental back-ups every week (or more frequently if I do a big shoot).
  • Every time I buy more disk, I put the most recent purchase (i.e. the largest volume) into the external hard drive and move the previous generation into my computer. That way, the external disk is always large enough to back everything up.
  • When I'm not backing up my files, I hide the hard drive away. If someone breaks into my house and steals my computer, the back-up hard drive will still remain behind.
  • I use Mozy as the back-up of last resort to protect against fire, flood or other disaster. I'm not going to lean on Mozy to restore any files that have been lost due to hardware failures.
Are you in a position to recover from a hard drive failure?


Monday, December 14, 2009

Luminous Landscape Video Journal 19

I'm a big fan of Luminous Landscape video journals. These started out as a quarterly CD subscription series and have morphed into a periodic downloadable video product. The journals are a collaboration between photographer/entrepreneur Michael Reichmann and videographer Chris Sanderson and feature video clips that appeal to a wide range of photographers. The usual winning formula is to combine a video journal of a photo workshop in an appealing location (e.g. Antarctica, Namibia) along with interviews with photographers and a feature on new technology.

The current journal (number 19) is particularly appealing. There is a two part series on Namibia with guest photographer Andy Biggs. This follows Michael and Andy on a workshop in several places in Namibia and shows some lovely scenery as well as some nice shots from the air.

There is also a good interview with Seth Resnick, stock photographer deluxe. This interview makes several good points, especially that good meta data can make or break a stock photographer's career. In one segment, Seth explains that he was the first to use the keyword "ecological tourism" on his photos and sold a ton of work as a result. Seth is a very animated subject and peppers his responses with the f-bomb (quacked out in post-production). Highly recommended.

The highlight of the journal for me was the interview with Andrew Collett, a Canadian photographer who works in the Muskoka area north of Toronto. Andrew makes his living selling landscape photographs. He also prints mostly on canvas. Michael's interview was terrific because it explored canvas as a medium without looking down on it. It also showed Andrew's full production process including how to stretch canvas onto a frame and spray it prior to displaying it. The best part of the interview was Andrew's candid explanation on how he makes money as a professional landscape photographer. He sells art retail through his gallery in Port Carling. He sells art at wholesale to decorators and hotel chains via interior decorating shows. He also sells art at various shows around Toronto, including the "One of a Kind" art show. Andrew also supplements his art income with workshops.

The two interviews with working photographers showed just how hard you have to work to make any kind of a living at photography. Unless photography is your life's passion, there's really no point in taking it up as a career. Seth and Michael discussed the market for photographers and it is pretty depressing. There are over 20,000 people graduating each year from college photography programs in North America and there are only 500 new jobs each year for the graduates. That's pretty slim odds! Only those that are willing to persevere and work all the hours that god sends need apply.

The interview with Norman Koren, the founder of Imatest, was much less entertaining than the others. For some reason, Michael kept asking wordy questions and wouldn't let Norman get a word in edgeways to tell his story. I'm not sure what Michael's agenda was, but the interview goes on far too long.

If you haven't seen a video journal, I should set your expectations straight. These are HD videos (720P), but they are not high budget production numbers. Chris Sanderson is a good videographer and the quality of the images is just fine. However, Michael is not a professional interviewer and there is no supporting cast of thousands - you won't mistake this for Art Wolfe's TV show. Non-photographers will find the material excruciatingly boring. But, if you are a photography fan, you'll find Michael's questions very insightful - he is equipped with curiosity and wants to know the same sort of stuff that you want to know.

My only suggestion for Michael is to make the material more relevant to the amateur photography audience. For example, I've seen a couple of segments now that feature some heavy duty equipment that is out of the reach of most non-pros. One example was Andrew Collett's canvas stretching machine. It would have been better to show Andrew using a canvas stretching pliers the way most people would start off. The second example was a segment several journals back where Bill Atkinson demonstrated his computerized matte maker. It would have been better for me personally if someone could have shown how to do good quality mattes using commercially available manual matte cutters.

These are just quibbles and shouldn't take away from my full endorsement for the video journal. Here's the link to download http://store.luminous-landscape.com/zencart/index.php?main_page=index&cPath=20.


Thursday, November 26, 2009

If a tree falls...

Today I've been musing about whether an artist needs an audience to be happy. As a photographer, I've been rather unsuccessful at marketing my work. I've had my images displayed in galleries and I've been part of a gallery catalog (see http://www.elainefleckgallery.com/catalogue.pdf page 39) and I've sold some works at silent auctions for good causes, but that's about the extent of it. No one is beating down my doors to buy my work.

Fortunately, I don't make my living as a fine art photographer and that suits me fine. It means that I can suit myself as to what I photograph. I don't have a demanding public who want more shots of specific subjects. I don't have to grind out hundreds of prints for gallery shows and customers.

It means I can do all the stuff I enjoy - taking images, developing images digitally and making lovely prints. All without worrying about whether people like my work or not. The truth of the matter is that I like my work and that is quite enough for me. I like looking at my images on the computer screen and I like looking at my prints as they hang on the wall.

I used to put my images up on flickr and pbase to gain an online audience and was moderately successful. But, I got a bit tired of the "you scratch my back, I'll scratch yours" culture where you had to spend lots of time commenting on other people's work so they would come to your gallery and comment on yours. I wanted to spend time taking pictures and making prints, not cruising around online photo sites.

I hope this doesn't sound like sour grapes. I'm really quite genuinely happy that my work is not more popular and hasn't attracted an audience yet. Occasionally I feel guilty for spending money on paper and ink where the prints I make are only for my own enjoyment, but then I think of my musician friends who do home recordings. They are in exactly the same boat as me. They like the process of creating music and laying down track after track and don't really seem to care much if no one else listens to them. I'm sure they feel guilty at times for spending money on guitars, recording equipment and software, but they shouldn't. These are wonderful pastimes that are rewarding in and of themselves.

No audience necessary...

Friday, October 23, 2009

Lightroom 3.0 Beta

I can now claim to be a Lightroom futurist :-)

Back in March, I wrote a blog that predicted that the Lightroom 3.0 beta would be introduced in October of 2009 (see http://huwmorganimages.blogspot.com/2009/03/speculation-on-lightroom-30.html) and here we are with the beta released on October 22nd. What a genius I am!

Unfortunately, I also made some predictions on possible new features and wasn't quite so bright on these. Let's take a peek:
  • Improved performance: got that one right. One of the design targets of the new release is superior performance and they've re-built the engine in order to obtain it. I also predicted that LR would take advantage of graphics cards, but there is no evidence of that so far (although Adobe might be holding something back for the release). It's strange that Photoshop uses graphics acceleration and LR still doesn't.
  • Print soft proofing: Zilch, nada.
  • Networkable version: also zilch. This feature would require a lot of rework, so it may not come out soon or ever. This product deficiency makes it tough for photo teams (e.g. photographers with assistants or production folks) to work together.
  • Improved masking: nothing on offer.
  • Built-in lens correction (like PTLens): nope
  • Expanded API (to be more like Aperture): nada. This is a huge weakness of the Adobe architecture. With no API that allows developers access to the image being worked on in real time, photographers are doomed to always having a discontinuity in their workflow where the concept of editing non-destructively is compromised by having to create an intermediate version for Photoshop or some other editor to work on.
  • Real-time integration with Photoshop (i.e. sharing an image dynamically): nothing
  • Improved smart collections: you can view them from the develop module now, but no extra capabilities (e.g. copy and modify).
What did the Lightroom team do instead?
  • A complete re-write of the raw conversion software to make it competitive with CaptureOne etc. This was sorely needed.
  • A new import module. I'm not sure there was anything wrong with the old one.
  • More print features. Always nice to have.
  • Better interface to photo sites. This was already well-served by the plug-in community.
  • Watermarking. This was needed too.
  • HD Video slide shows. Video is not my thing, but I guess this is a good feature for some.
  • Pro level sharpening and noise reduction. This will be a good thing when we see it finished. It will reduce one reason to do the round trip to Photoshop or other packages.
Let's ask the obvious question: is this new release going to be something worth buying? We know that Adobe is going to ask for money. Here's my concern. The main guts of this release are the speed improvements and the re-write of the raw conversion software. In my opinion, this is something that Adobe should send out for free - these are fixes to deficiencies that have dogged Lightroom from the start. We shouldn't have to pay for Adobe to bring the package up to the competition.

The new import dialog, watermarking, better interface to photo sites and new print features sound like something that could easily have been included in point releases. These don't justify paying for an upgrade.

Pro grade sharpening and noise reduction are substantial features and are probably worth paying for. I'm not sure they are enough to justify a complete new release since they were features that already existed in 2.5.

In short, I'm disappointed that Adobe didn't include more goodies in this release. It seems like the developers decided to bite the bullet and correct some basic flaws in the LR engine and then threw the marketers a few bones to try to justify charging money for the upgrade. I'll probably buy it, but I reserve the right to be grumpy about it!

Friday, August 21, 2009

What I Did on My Summer Holidays

This summer, we didn't take an exotic trip to Italy or France or Orstralia. Our youngest daughter is getting married in September, so our money is committed to paying for a very lovely wedding plus a party in Scotland the following week-end (the groom is a Scot). It should be lots of fun, but there's nothing in the cookie jar for jaunts to Europe and the like.

Green Rock and Rapids - Minden Ontario

Instead, we decided to vacation in our own backyard, lovely Haliburton Ontario. We spent an enjoyable week at the cottage and my wife and I booked courses at the local arts college, Haliburton School of the Arts, part of Sir Sanford Fleming College. Naturally, I booked a photography workshop and Trish booked a class in stained glass making.

Shangri-la, Minden Ontario

After looking around at a lot of photography workshops and experiencing a rather expensive one with Alain Briot last year, I'm very happy to say that this summer's workshop was the bargain of the century. It only cost $250 CDN and it ran for a full five days. Not only that, but it was in some of the loveliest countryside you can imagine and the instructor, Rob Stimpson, was first-rate. The workshop was a little on the large side, with 18 participants, but my fellow classmates were a pretty talented bunch and I learned a lot from seeing the world through their eyes.

Waitress, Haliburton Ontario

We spent a couple of hours in the classroom each day getting sound advice from Rob, a very seasoned and talented travel photographer. The rest of the time was spent taking photographs in Haliburton and vicinity. For those that may not know where Haliburton is, it's a small town just to the south east of Algonquin Park and is a couple of hours north of Toronto. It is a very photogenic area and has lovely lakes, great rivers with rapids and the town itself is very nice with several older buildings worthy of a photograph.


My Palace, Haliburton Ontario

Rob Stimpson offers several other workshops throughout the year and, based on my experience in Haliburton, I'd recommend his workshops to anyone. He's a very congenial companion and a very knowledgeable photographer with a talent for communicating what he knows.


Nothin' to do but Fish, Haliburton Ontario

There are two workshops in particular that I'm keen to sign up for. The first one runs in June and features moose photography in Algonquin park. Rob says that he sighted 16 moose in this year's workshop and I saw some of his stunning photographs of moose munching away with lovely backdrops of wetland scenes. At this time of year, the male moose are quite docile, but they still have the good beginnings of a rack. They don't seem to mind canoes getting up close and personal, so you can take great shots without having to tote around 800mm lenses.


Bucking the Wave, Minden Ontario

The second course that I intend to take in the next couple of years is Rob's Gales of Adventure workshop. Anyone who grew up listening to Gord Lightfoot's classic Wreck of the Edmund Fitzgerald (click on link to see a wonderful video of the launch and demise of the ship set to Lightfoot's music complete with underwater photography of the wreck) will instantly see why I want to take this course. Here's a brief description from Rob's site:

"November is traditionally storm season on Lake Superior. Stormy seas, fall skies and Superior's mighty shores are some of the most dramatic and powerful landscapes a photographer could dream of. Capturing them on film or digitally is a passion of artist Rob Stimpson. This workshop, timed to take perfect advantage of Superior's surely moods and spectacular scenery, will appeal to the person who knows the workings of their camera and wants to create, not just take, photographs."

Plus, you get to stay in the relative comfort of the Naturally Superior Adventures Lodge. All this for $795 CDN (based on single occupancy). What a deal!

All in all, it was a wonderful way to spend a week and I enjoyed it immensely. I also got some nice photos for my portfolio and will enjoy printing them out in the cold winter months.

Thursday, August 20, 2009

Canon Lowers Resolution - A First!

Ladies and Gentlemen, we have a first! Canon has released its G11 compact camera and has returned the sensor back to 10 MP (down from nearly 15 in the G10). Could it be that the megapixel wars are over and camera manufacturers are listening to consumers who want image quality above all else? As Mike Johnston speculates in The Online Photographer, maybe Canon's move is motivated by the success of the Panasonic DMC-LX3, a 10 megapixel compact that is flying off the shelves.

I don't care what the reason is - I think this is wonderful news. I'd also welcome an updated Canon full-frame camera at around 13-15 megapixels. I've heard that the 5d mark II with 21 megapixels is difficult to use hand-held. Apparently, some camera movement blur shows up with the higher-resolution sensor - blur that would be masked by a lower-resolution sensor. My 13 megapixel 5d has plenty of resolution and works well without a tripod for most shots. I'd just like a higher resolution display and the sensor dust removal feature with a lower price point than the mark II.

Canon, are you listening?

Sunday, August 16, 2009

Improving Blown-out Skies with Lightroom

I read a recent article by Mark Segal on Luminous Landscape entitled You'd Be Surprised What Those Files May Contain. In the article, he makes the good point that raw files with blown-out skies may actually contain much more information than you might think. He offers up a rather complex method involving editing two versions of the image in Photoshop. In the original image, he adjusts the tone curve to favor the sky and manages to recapture quite a bit of interest in the sky. He then adjusts the tone curve in a virtual copy of the image to favor the rest of the image. He edits both versions of the image in Photoshop and copies the good sky from one image into the other that was optimized for the rest of the photo.

While there is no doubt that this technique works, there is a tool in Lightroom that often works very well without having to do the round trip into Photoshop. It's called the gradient tool and it is very easy to use. For a good tutorial, click here.

Here is a quick example of how you can restore lost parts of the sky. The first image is exactly the way it came out of the camera, sensor dust and all:


In the second image, I've created a gradient from the top left of the image down to the roofline of the building and I've decreased the brightness of the sky. The result is a sky with lots more contrast:


There is a lot of tweaking that ought to be done - the saturation could be increased and the exposure of the sky could also be adjusted.

However, this is a quick and dirty example of a very powerful tool that often makes the round trip to Photoshop unecessary.

Thursday, July 23, 2009

3D - It's coming

The big news of 2009 so far has been the advent of video as part of the DSLR offering. We've seen offerings from Nikon, Canon and now Panasonic that have videophiles all atwitter. Michael Reichmann, in particular, has been quite taken with this new development and he's quite an influential guy, not to be taken lightly.

However, I'm not a video guy and the whole video thing leaves me cold. I've never been an aspiring movie director and still photography consumes all my spare energy.

3D still photography, on the other hand, does turn my crank! I have great memories of playing with a viewmaster as a child and the awe of seeing a three dimensional image of somewhere interesting like the Grand Canyon or the canals of Venice. I think this is where I caught the travel bug.

Fuji just announced some significant 3D developments. It isn't the first 3D camera on the market by any means (just look here), but Fuji has announced a complete system that promises to transform the 3D market. Instead of requiring a binocular viewer that makes the viewing of 3D images a bit of a hassle, it looks like Fuji has developed a 3D viewer screen that doesn't require special eyewear as well as a print-making process that creates 3D prints that also don't require special eyewear.

The 3D viewer consists of an 8-inch LCD screen (600x400 resolution) with two channels. Each channel is aimed at one of your eyeballs to simulate parallax and fool your brain into thinking that it's looking at a 3D image. It has a modern GUI (very iphone-like) with a touch screen.

The camera is pretty cool. It has dual sensors and can record 3D stills and movies. It can also work as a 2D camera where you can take two conventional photos at the same time.

There isn't much available on the print making process yet - other than to say that you'll have to send your images to Fuji to have your prints made.

There is also no word on pricing yet, so stay tuned. If the price is right, I'm going to put one of these cameras and the viewer on my Christmas list and play around with this new/old medium.

POSTSCRIPT
As I was tooling around the 'net looking for 3D stuff, I came upon 3-D Review, a great blog site that seems comparable to Mike Johnston's The Online Photographer in the 2-D world.

Wednesday, June 17, 2009

A Few Observations on a Rainy Day

The U.S. Open golf tournament is about to start tomorrow and they're expecting a lot of rain. There will be more than 50 squeegy people waiting to get the water out of the greens in an emergency. Photo journalists have a hard enough time lugging big expensive cameras with big expensive lenses around hilly golf courses without having to cope with miserable, wet weather. Covering golf events sounds like a great job until you see a photog burdened down with two pro bodies and three huge lenses running between holes to get in position to take yet another photo of Tiger Woods. Add in some mud and a few torrential downpours and you can take that job and shove it!

Speaking of emergencies, I've been reading a lot of camera reviews lately where the reviewer says something like the following: "the Acme 300SX takes great pictures up to 400 ISO. Beyond that, the amount of noise starts to become and\ issue. The claimed maximum ISO of 64 million is good for emergencies only". What kind of emergencies? I'll be damned if I can think of any good reason for having an inflated ISO level that makes subjects look like they have the plague. Perhaps they think we'll all have the presence of mind, when being mugged in a dark alley, to pick up our camera, turn it on, select the highest ISO setting and shoot speckled photographs of our fleeing accoster. Or is there some other "emergency" that I've missed?

We have a hot new camera poised to hit the marketplace. The Olympus E-P1 adds its name to a small stack of contenders for what Mike Johnston calls the DMD or Decisive Moment Digital Camera. These are cameras that are small, preferrably pocketable, responsive and able to produce high quality images. Here are some of the contenders:
  • Panasonic Lumix DMC-LX2 and LX3. I have an LX2 and find it a decent compromise. It is capable of good quality (it has a Leica zoom lens), but suffers from shutter lag and poor high ISO performance. The LX3 has a faster, wider lens that makes up somewhat for the poor low-light performance. Great for city landscapes, poor for taking photos of anything moving. As a DMD, it is more of a miss than a hit.
  • Sigma DP1 and DP2. The DP1 has been available for a while and the DP2 just came out. Reviews have been mixed. Picture quality has been praised, while general responsiveness has been panned. Auto focus is poor for both cameras and build quality is low for the price (just under $900). If all you desire is DSLR quality images in a small format, then the Sigma delivers. However, it is not a DMD because of the slow auto focus and response.
  • Olympus E-P1. This newest entry to the DMD sweeps has a nice-sized 4/3rds sensor and supports interchangeable lenses. There aren't any reviews out yet, but the previews suggest that auto focus is crisp in normal lighting conditions and that shutter lag is minimal. I would guess that image quality would be on a par with Olympus DSLR's (i.e. very good). Pending the availability of hands-on reviews, this sounds very much like a DMD contender!
One thing to note about these DMD wannabes is that the optical viewfinder is a thing of the past. I've often thought that digital cameras are undergoing a slow transformation a little like cars did at the beginning of the 20th century. If you recall, the first cars looked like carriages with engines mounted on them. Similarly, the first DSLR's looked like film cameras with the sensor installed where the film used to be. Now, with the micro four/thirds system, we're starting to see radical changes. The mirror and the optical viewfinder are going away in favor of using the LCD to compose photos. Fast microprocessors are automating adjustments for lens distortion and noise reduction. ISO has been elevated to the same variable status as shutter speed and aperture instead of something you set and forget. It won't be long before the camera automatically generates composite multi-exposure images to obtain more dynamic range and greater depth of field.


Tuesday, June 9, 2009

Microsoft Bing? Booooo!

Microsoft has released its new search engine Bing and, purely from a selfish point of view, I'm not impressed. I'm very anxious that anyone who searches for my name and photography can find one of my web sites (either my blog, my website, my pbase site or my flickr site).

The good news is that Google finds all of these sites (and more) on the first page. You would expect that out of a search engine. Huw Morgan is not a common name and, as far as I know, I'm the only photographer with that name.

Bing doesn't seem to get it. None of my sites is on the first page. Not one! There is an obscure reference from another blogger's site, but nothing about my sites. Nothing shows up on subsequent pages either. I seem to be invisible to Bing.

Maybe Bing does well for common search terms, but for obscure photography bloggers with unusual names, stick to Google!

Thursday, June 4, 2009

White Balance and Gray Cards

One of the big attractions of capturing your images as RAW files is that you can adjust white balance afterwards so that your images don't have annoying colour casts. There are several ways of adjusting white balance using a tool such as Adobe Lightroom:
  • If the image has a gray or white area in it, you can take the white point eye dropper tool and click on that area in the image. Lightroom will automatically adjust the red, green and blue levels to make that area neutral.
  • If you have a handy gray card (like the WhiBal) and remember to actually photograph the gray card during your shoot, you can use the white point eye dropper tool and click on the gray card to get the appropriate white balance. This white balance can then be applied to all the other images in the shoot using Lightroom's sync feature.
  • The final technique is to use Lightroom's white balance adjustment control to set the white balance to something that looks pleasing to the eye. This technique only works if you have profiled your monitor. It's no use setting a white balance on a monitor that has a colour cast to it.
I was reading Tim Grey's daily e-mail today and he makes a great point about white balance:

"in most cases you are not trying to neutralize the color temperature of the lighting under which you were photographing. Quite the contrary, in most cases you were photographing when you were for the express purpose of capturing the warm lighting that was present at the time. As a result, in most cases it is not helpful to use a gray card as the basis of a white balance compensation. Instead, I would either use an "auto" setting for White Balance in your camera, or use the setting that seems to best match the existing conditions with the understanding that in any case you may need to apply a compensation in the RAW conversion in order to produce the most accurate (or desirable) results possible."

I don't blame you if you are confused at this point. When do you use a gray card and when don't you? Here's some guidance on when you'd want to use a gray card or adjust white balance using the eye dropper tool:

  • If you are taking indoor pictures of people or outdoor photos of people at sunrise or sunset and want a natural flesh tone, then you must use a gray card. Artificial light is notorious for fooling the auto white balance setting of the camera. Quite often, lights sources are mixed (e.g. flourescent combined with flash) and the camera won't know how to adjust for the resulting colour cast. Similarly, photos at sunset result in orange flesh - not a good look!
  • The inverse is true - if you are taking photos of a rock band with a light show, then you'll want to preserve the colour of the lighting and may not want to adjust light balance.
  • If you are taking photos of a sunset or sunrise, you might want to take a photo with a gray card so that you know what neutral lighting looks like. If you are adjusting white balance manually to taste, then it is nice to know the boundaries and neutral will be at one end of the spectrum. However, to emphasize Tim's point, neutralizing a sunrise makes the effort to get up in the morning pointless.
I hope this helps with this confusing topic.

Sunday, May 24, 2009

Correct Lens Distortion

I'm a big fan of raw processing. I use Lightroom to process raw photographs from both my cameras (a Canon 5d and a Panasonic DMC-LX2) because it gives me lots of advantages:

  • White balance Correction. More often than not, the camera gets the white balance wrong. Sometimes the adjustment is minor, but other times (e.g. indoors with the Panasonic), the adjustment is quite drastic.
  • Recovery of blown highlights. I try to expose to the right when I shoot in order to maintain as much shadow detail as possible. Sometimes, I'll blow the highlights out slightly. Not to worry, with Lightroom I can recover these blown highlights while retaining the detail captured in the shadows.
  • Adjustments (e.g. curves) done in 12+ bits to preserve smoothness of the curves.
  • Production of finished photos using lossless compression - important if you are going to edit the photo again and again.
However, some camera manufacturers are packing more and more processing into the camera itself. This is due to competitive pressure as well as the continual improvement in the raw processing horspower available to camera manufacturers. Most "normal" digital cameras are capable of doing white balance adjustment, color correction, saturation adjustments, sharpening and Jpeg compression in the camera. But, now we're starting to see cameras, such as the Panasonic DMC-TZ5, correct for lens distortion.

This raises a bit of a dilemma. Should you give up the advantages of external raw processing in order to avail yourself of in-camera lens distortion?

Fortunately, help is near at hand. There are several software packages that you can download to help you correct lens distortion in your camera. DxO Pro is certainly a leading candidate, but it is not cheap! A less expensive option is PTlens from Thomas Niemann. This Photoshop plug-in has profiles for all my Canon lenses as well as for my fixed lens Panasonic DMC-LX2. Here's a review of the software on the Digital Outback Photo site.

The best news is that the software can be evaluated for free and only costs $25 to license. In this day and age, that is a bargoon!

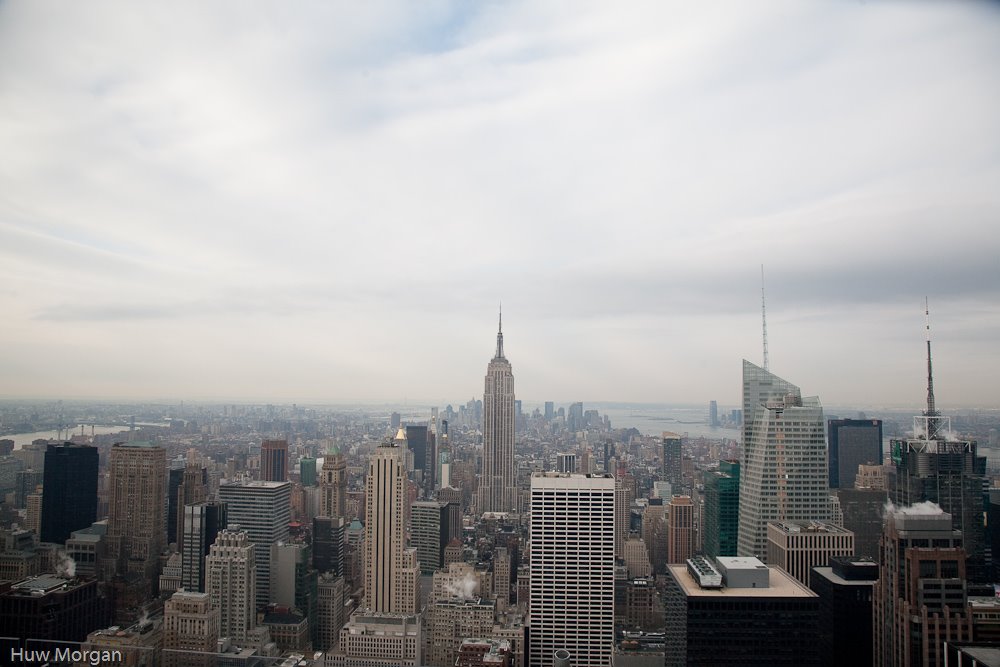
Here's an example of a photo corrected with PTLens. The photo was taken from the Top of the Rock (top of the Rockefeller Center in New York) with my Canon 5d and the 24-105 L lens at its widest (24mm). There is a lot of perspective distortion:


I edited the photo in Lightroom to correct the exposure and then exported it to Photoshop with Lightroom edits intact. While in Photoshop, I ran Noise Ninja to remove noise, then used smart sharpen to do some sharpening and ran PTLens to correct the distortion. My final adjustment was to run the Velvia Vision action to add some local contrast and more saturation.

Here's the result:


As you can see, PTLens has corrected the perspective distortion and vignetting. It has also automatically corrected for my lens' pincushion or barrel distortion at the 24mm mark.

The software is amazingly intuitive and does a splendid job of fixing lens issues.

Photoshop CS4 has a very good lens distortion filter, but I prefer PTLens because it runs as a Lightroom external editor and quite often I prefer to stay in Lightroom and edit my photos.


Friday, May 15, 2009

Windows 7

This is normally a blog about photography, but photographers in the digital age spend an inordinate amount of time on their computers, so occasionally it makes sense to talk about new software tools that make our jobs easier. I'm happy to report that Windows 7 is one of those tools. 

At the risk of insulting Microsoft, the best operating system for my PC is one that I don't notice. The less intrusive an operating system is, the better I like it. My PC is a tool that I use for my job and photography and Windows 7 is a great operating system because it fades quickly into the background and simplifies my life.

I've been running the Windows 7 release candidate now for a week. I've rolled it out from a slow single core Pentium machine that acts primarily as a printer attachment on the network to my main desktop (four Intel cores) and now my laptop (two Intel cores). Prior to that, these three machines were running Vista with mixed success. 

Vista was a disaster for the old printer machine because it needed more memory than I could install on the box. The old Pentium had the max 2 gigs of memory, but Vista thrashed around and couldn't run Photoshop or Lightroom without the disk light going non-stop, indicating that memory was swapping in and out constantly. Response time was abysmal. It took forever to boot. I managed to make the situation workable by plugging in a 4 GB flash card and using it for swap space - Vista still thrashed about, but response times were manageable.

Under Windows 7, the old machine's disk light still goes a fair bit after booting, but eventually it settles down to a nice equilibrium, indicating that the Windows 7 memory footprint is smaller than Vista. Switching from application to application is really snappy. Boot times are definitely much lower. My old computer has come back from the dead with Windows 7.

For my other machines, each with 3 GB of memory, Vista was not really a performance issue. The quad core desktop handled Vista pretty well and the laptop was a bit more sluggish than under XP, but tolerable. Windows 7 has really helped snap up the laptop and is even helps the faster desktop.

It's interesting to read the PC World article that claims that Windows 7 is not much faster than Vista. I think they totally miss the point. It is absolutely true that applications like Lightroom and Photoshop run almost exactly the same speed on my main editing machine on both operating systems. But, neither one runs well on Vista on my older, slower machine with less memory. With Windows 7, they run tolerably well. Windows 7 is much better from a speed point of view because it just seems snappier. Going back to my original premise, you don't notice an operating system that switches back and forth from one window to another without delay. And that's a good thing!

The other thing I really like about Windows 7 is the simplified user interface. The bottom task bar can now be used for all your commonly used software and it works just like (surprise!) MacOS. All your common apps are arranged across the bottom of the screen. When an application is running, it gets a little box drawn around it (as opposed to the little MacOS divot). When you hover your mouse over the running application, it gives you a little screen snapshot (or more if you have two or more instances running). This is really nice.

But, going back to the theme of this post, Windows 7 is really good because it doesn't annoy you. Applications switch back and forth quickly. It boots quickly. After you put your laptop to sleep, it wakes up quickly without a bunch of thrashing around. The interface is simple and elegant. I've experienced almost zero bugs with the release candidate version. Installation was fast and simple - you don't even have to watch over it. Once you've answered a couple of questions, it installs all by itself.

I think Microsoft has a winner on its hands here! Finally.

Thursday, May 7, 2009

Frustrations of Photography

I've been doing a lot of reading lately about successful landscape photographers. The common themes include an all-absorbing love of nature as well as a willingness to do what it takes to get wonderful image. Here are some examples:

  • 1st place winner of Canon's In the Parks photo contest Robert Blanchard tells Shutterbug magazine that he "positioned myself at "bird's eye" view by lying prone in the mud with my tripod legs extended out flat". The resulting image of a heron in the water is lovely.
  • In the same issue, second place winner Brian Rueb risked a soaking in icy water by going to the edge of thin ice to capture a reflection of El Capitan in Yosemite.
  • The December 2008 issue of Digital PhotoPro has several articles on modern masters. The thread that ties them together is the amount of hard work that they do to create their images.
I'm not averse to hard work. In fact, one of my nicer tree images was taken in a swamp during black fly season where I was in danger of being eaten alive before getting the shot.

Sometimes, however, despite hard work, things just don't work out. I'd been planning to do a shot of a lovely barn that I know of just as the full moon rises behind it. I'd planned the shot by going onto the Internet and finding the day that a nearly full moon rises in the early evening just prior to sunset. The choices were May 6th and May 7th. 

Yesterday, I headed home early from work, grabbed my camera and headed north to the barn. In the traffic, it was about a 2 hour drive. When I left work, the sun was out, but there were clouds on the horizon. As I drove north, the clouds steadily gained on me and by 6 o'clock, the sky was completely covered. I headed home with my tail between my legs.

I'll just have to go back to the drawing board and pick the next full moon evening.

Wednesday, April 15, 2009

New York

I was in New York last week for a fantastic couple of days. I'd been invited to sing in the chorus of Scotland the Brave, a terrific musical show put on by Sean O'Boyle and Andrew McKinnon featuring pipers, drummers, dancers with full orchestra and chorus. We sang in Avery Fisher Hall in the Lincoln Centre - quite a thrill!

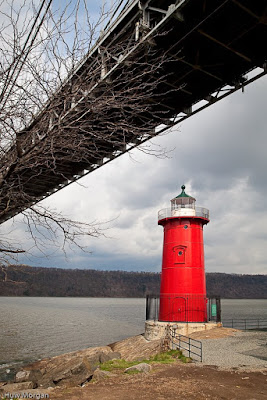
While I was in New York, I took some time to photograph the city. I'd purchased a very good book called The 50 Greatest Photo Opportunities in New York City by Amadou Diallo. 50 photo ops was a bit ambitious for two days in the Big Apple, so I decided to focus on a couple of photogenic sites: the little red lighthouse under the great gray bridge (made famous by this children's book) and 5Pointz, a factory in Long Island City, owned by artist Meres One, that's world-famous for its graffiti. 

Here's my take on the lighthouse:


And here's my favourite artwork from 5pointz:


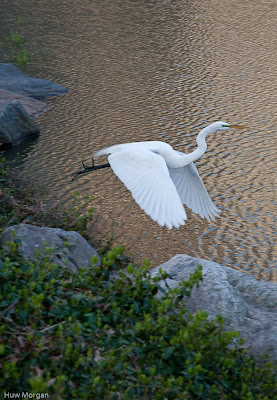
I was also very lucky to catch a heron in flight early in the morning in Central Park:


All in all, I had a very good time travelling around the city taking snaps. I've been travelling to New York for many years (starting in the 70's) and I've experienced the city at its worst, with vandalism and graffiti everywhere and neighbourhoods too scary to walk in. I saw some photos being sold in a park last week that illustrated the subway system in the 80's with cars sprayed with paint inside and out and homeless people everywhere. I'm happy to report that this is all in the past and the subway system in New York ranks right up there as the cleanest and safest in the world. It was a pleasure to ride the Metro all over the city and very economical. For $7.50, you can ride the system all day and I was able to travel up as far as west 180th street and as far east as Long Island City quickly and easily.

Friday, April 3, 2009

Equipment versus Ability

Many people have written about whether it's the camera equipment that matters or the photographer. Here are two articles on the subject: Your Camera Doesn't Matter by Ken Rockwell and Your Camera Does Matter by Michael Reichmann. I'm somewhat conflicted on the subject. Clearly, having a camera is important. You can't take pictures without one. But, how good does the camera really have to be and how technically proficient does the photographer have to be? These are very different questions.

What got me thinking about this was an article by Mark Dubovoy on the Alpa medium format camera. Embedded in the article is a picture of Full Moon Dome in Zion National Park. Mark's quote on this photo (not apparent in the jpeg) is "the quality of the file is simply stunning" While the quality of the file might be simply stunning, I find that the quality of this particular composition is simply boring. I don't want to dump on Mark - he is capable of outstanding work. I'm just making the point that a preoccupation with image quality can cause an artist to lose focus on the artistic side of photography. What's important is not the resolving power of the lens, but the image that it captures.

For example, Galen Rowell used a 35mm camera exclusively. He did this because he often hiked miles to get a photograph and didn't want to be encumbered with a large camera or even a tripod. Yet, he took stunning images that can be blown up into very large prints. 

I'm always amazed at the number of magazine articles and web posts that are devoted to camera announcements and reviews and how little press is devoted to the artistic side of photography. My contention is that you quickly run into the law of diminishing returns once you've acquired a camera of good quality. These days, good quality probably means a Canon Rebel or a Nikon D70. Anything else is probably overkill and will give you a hernia or slipped disk.

Technical proficiency is also a focus of many workshops, tutorials and classes. I find that a bit of a red herring as well. Photographers tend to come at their passion from one of two ends. On one side, we have artists who gravitate to photography because they love the medium. On the other side, you have technologists who start with the love of the gizmos and then gravitate to the artistic side once they realize that money can't buy you good images (unless you buy someone else's). My intuition would be that artists learn only enough technology to get the job done and then stop because they are passionate about the art and want to spend all their time creating images. Technologists are at a disadvantage because they are insatiably curious about the technology and spend too much time fiddling with new cameras and software and not enough time practising the craft of producing good images. I know because I'm a geek and love all that stuff. 

The moral of the story? Find a good camera system that works for you and stop reading equipment reviews. Spend all your time taking photos and printing them out. Nurture your talent, find your voice.

Monday, March 30, 2009

Digital Printing on Demand

Today's New York Times features an article on a new service from Hewlett-Packard called MagCloud. This is a very exciting development. For those of us that really like photo magazines, it is now possible to publish a magazine and not worry about print run sizes at all. HP makes presses that don't use plates, so the set-up cost is virtually nil - the printer just loads your electronic magazine into the press computer, sets the number of copies and out comes your magazine printed on 80lb. paper, saddle-stitched.

The cost at 20 cents a page is quite reasonable too. You get to establish your selling price (and hence profit margin) and HP markets the magazine for you as well.

Here are some photographic magazines that are being sold on the MagCloud site. They range from International Photographer Issue #1, a serious attempt to launch on ongoing periodical, to Brian Patterson Digital Photography, a magazine featuring a selection of one artist's work.

Anything goes, anything is possible. You're limited only by your imagination!

Recently, some of my images were selected to illustrate Rails Magazine, a new magazine about the Ruby on Rails programming environment. The editor of Rails Magazine is using the MagCloud printing service to distribute paper editions of the magazine. you can see the magazine with my illustrations here. I thought I'd like a copy of the magazine, so I placed an order using Paypal. The magazine cost $8.00 with another $3.00 shipping for Canada and the magazine was going to be printed (quantity 1) and shipped so it would arrive within 7 days. Pretty impressive!

Sunday, March 29, 2009

New Web Site

I just finished my second generation web site. I needed a place to market my photographs and it was also fun to work on a web-site trying to use the latest xhtml and css techniques. The web site is very simple in design, but it uses no tables and conforms to strict html 4.01 guidelines with proper end tags and without deprecated parameters or tags. 

When I was working on the web site, I found a great source of html documentation at w3schools.com. I highly recommend it.

My site is hosted at netfirms.com. This is a fine Canadian hosting company that takes good care of its customers.

Please visit my web site and, if you like the images, please feel free to order a print. Drop me a line at purchase@huwmorgan.ca.

Friday, March 13, 2009

A Speculation on Lightroom 3.0

Adobe Lightroom 1.0 was released on January 29th, 2007. Release 2.0 was born on July 29th, 2008. The beta appeared in April. It's hard to discover a pattern with so little data, but let's do some speculation for fun. Let's say that Adobe, a company that likes money and depends on new releases to generate some, wants to sell a new release of Lightroom every 18 months or so. This means that version 3.0 ought to be available on January 29th, 2010. Let's also surmise that the beta will appear four months before the official ship date. That would bring the beta announcement back to October, 2009. So, in just over six months, we'll have some excitement in the Lightroom universe.

Now for some more rampant speculation. What's going to be in the new release? Here are my predictions, based on what I've seen in the blogs and what I'd like to have:

  • Better performance. We've seen the introduction of graphic card acceleration in Photoshop and I'm sure the Lightroom guys are hard at work bringing this set of tricks into their product. I've now installed a fast graphics card and the impact on some aspects of Photoshop is amazing. Lightroom badly needs a shot of this lightning in a bottle.
  • Print Proofing. The print module in Lightroom is terrific except for one thing -- you can't proof your work to see if the conversion to the output ICC profile has resulted in something pleasing. Either this is a conspiracy between Adobe and the paper companies to force you to keep printing out proofs or this is something temporary that was waiting for quality developer time. I suggest we'll see this feature soon.
  • A Networkable Version. Knowing Adobe, there will be a "Pro" (i.e. expensive) version of Lightroom that will allow multiple users to share a catalog. This is a challenging project because it means that Adobe will have to find a database that they can ship inside their product that supports all the robust features needed for a multi-user environment. As someone who has tried to open a catalog on a network drive, I can also testify that the application is extremely chatty -- the database is continually being read from and written to. This chattiness will have to be damped down if the application is to be ported to a network. Some sort of local caching might be the solution. However, this is a huge opportunity for Adobe to grab some money from photographers who have a collaborative workflow, so look for it in the next release.
  • Improved masking. Local adjustments were a very welcome addition to Lightroom 2.0 and they generally work well. However, the masking capabilities of Lightroom are restricted to an automatic mode that doesn't suit all applications. It would be nice if there were ways of selecting elements of a photo (e.g. marquees, lassoes, colour pickers etc.) that would allow the setting of a manual mask.
  • Image Stretching. When taking photos of buildings with wide angle lenses, I frequently find myself reaching for that round trip through Photoshop to do a little bit of perspective adjustment or similar image stretching exercises. I'd like to see this capability inside Lightroom.
  • Expanded API. The current way of integrating third party applications into Lightroom sucks to put it mildly. Does anyone really want to chop their workflow into three distinct stages? Let's say you want to apply a third-party sharpening tool. Right now, you have to do your pre-work in Lightroom (e.g. import into the catalog, add keywords, ranking etc.), export the photo to the sharpening tool and then re-import the photo before you can apply the rest of the editing changes to it. The benefits of working on the raw file go out the window as soon as you export the file to the sharpening app. What's needed is a way for third-party tools to be able to operate on the raw file inside Lightroom via a safe API that allows the third party developer to see the internal data model of the image. I'd like to see the Lightroom panels to be expandable so that third-party applications can be added in just like you can add user-defined presets. Let's make it possible for a scenario like this to happen: I move to the develop section of Lightroom to start working on my image. On the right-hand panel, there is a new section called Plug-ins. I expand that section and click on Noise Ninja. The Noise Ninja control panel expands and allows me to fine-tune the noise reduction parameters before I apply them. Once I click on the "apply" button, Noise Ninja does its thing to the raw image. As with any other Lightroom adjustment, I can independently toggle between the before and after image to see what NN has done. The NN adjustment is totally non-destructive and can be undone at any time with no impact on any other adjustments. That's the scenario I'd like to see in the next release.
  • Better Integration with Photoshop. Real-time integration between software applications is not a new phenomenon. Microsoft has offered this in its Office line-up for years. Yet, Adobe seems to be having difficulties with this. To transfer a file to Photoshop, you have to export it to another format, work on it in Photoshop and then save it. Lightroom automatically imports it into the catalog as a completely different image. Why can't we have real-time cooperation between these applications? Let Photoshop open up a smart object that's a real-time view into the Lightroom catalog and image file. Let me make adjustments in Lightroom that show up immediately in the smart object in Photoshop. How about letting Photoshop write its adjustments back into the Lightroom catalog in real time as an overlay to the Lightroom edits? Of course, there would have to be limits, but Photoshop already has a working subset of functions that can applied via layers to a smart object.
  • Improvements to Smart Collections. Smart collections are brilliant. I love the ability to create dynamic collections based on image metadata. But, I'd like the user interface to be a little smoother. For example, how about sensing keystrokes when you're entering in a keyword and presenting you with a list of keywords that match the keystrokes so you don't have to remember the spelling of the keyword? This is pretty common practice for web applications. How about the ability to clone a smart collection and save it under a new name? This would speed up my ability to rapidly create smart collections that follow a template. Here's an example. For each of my portfolios, I create a series of smart collections that allows me to find stuff quickly. I put all the unrated photos with the portfolio keyword in one collection. I put the rejects (low-rated) into another. I put the print candidates into one collection and the ones that I've printed into another. I use this template for all my portfolios, but setting this up was a pain because I had to type in each one. It would have been nice to establish a pattern and then clone it for each portfolio. All that would have to be changed would be the keyword corresponding to the portfolio.
That's my wish list for now.

Thursday, March 12, 2009

The Joy of Being Green

St. Patrick's Day is coming up next week, so I thought I'd start early and celebrate the colour green. Yesterday, I talked about the difficulties that artists have when they paint or photograph scenery in the UK. The colour green is everywhere. It sometimes dominates to the detriment of the other image elements. You can get away from this by reducing your images to black and white or you can suck it up and strive for compositions and lighting that rises above all that green.

Last autumn, I had occasion to travel to England and Wales for the funeral of a favourite Uncle. He was nearly 90 when he died, but it was still a sad occasion. I decided to take the last day before flying back home to travel the back roads to London and visit a lovely aunt that lives in Gloucester. Fortunately, it turned out to be a lovely day and I was able to take a few nice photographs of the lush countryside. Here are four images that I quite liked. Note the presence of lots of that colour that starts with G.


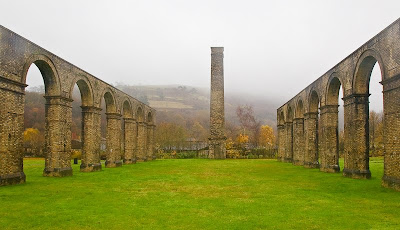
My first stop on the journey was the Welsh town where I was born. It's called Ystalyfera and it's just to the north of Swansea on the Tawe River. This lovely misty shot was taken in a park that used to be a factory. I'm sure that when I was a toddler growing up in the town this factory was going full-tilt with smoke pouring out the stack. Now it looks very much like the ruin of some old monastery.


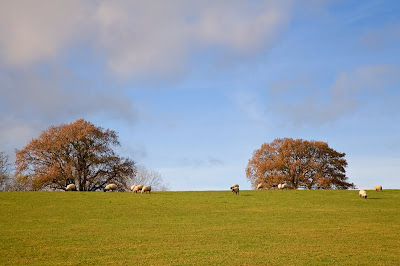
My father used to commute between Wales and England for a time, using an old motorbike. He suggested some lovely B roads that I could follow where I could see some lovely rolling countryside. Here's my favourite image from the roadside, with the sun low in the sky illuminating the sheep as the graze up on the hill. The trees are showing fall foliage and the sky has cleared. Here's a photo with more blue than green for a change!


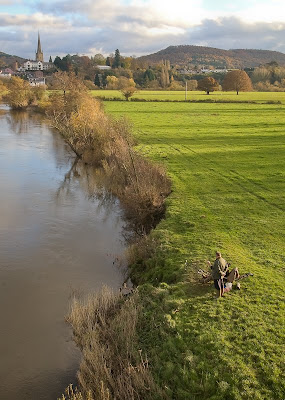
At the end of the B roads, I turned onto a busy motorway and headed towards Gloucester. The sun was starting to set and as the road was going over a bridge, I noticed that some cars were parked on the verge beside the road just over the bridge. I parked at the end of the line and walked back over the bridge. This must be a prime fishing location because there were fishermen arranged along the river. I was struck with this beautiful view of Ross on Wye. The steeple reflected in the river and the puffy little clouds were just perfect. The scene looks very tranquil, but I was standing on a bridge with cars and trucks whizzing by me at high speed just a few feet away.

This is my favourite image from the day. The sun is setting to the right of the frame. These two fishermen are relaxing in the warmth of a fall day watching their lines. Ross on Wye is tucked into the top left of the image and all the lines are flowing from the fishermen at the bottom right diagonally towards the town. I don't think central casting could have found two more rustic looking fishermen than these.

When it came to printing these four images, I had an internal debate. With my new printer, I'm always thinking big, but somehow these little emerald jewels wanted to be printed as miniatures, so I ended up printing them as 4"x6" images and matting them in an 8"x10" frame. This way, they can be mounted as a collection of four smaller pieces. The colour green is actually an integrating element that makes them look like a matched set. The quality of the light is very similar for the four prints because the late autumn sun was low on the horizon all day. I printed them on Hahnemuhle Fine Art Pearl paper and they really pop quite nicely under light. They looked so nice that my wife surprised me by suggesting that we find a spot on the wall for them.

Wednesday, March 11, 2009

James Ravilious

Thanks to Mike Johnston over at theonlinephotographer.com, I've just been introduced to the photographs of James Ravilious, an English photographer who died in 1999. Ravilious lived in a very rural part of Devon and was employed for nearly two decades by the local art centre to take pictures of the vanishing life of the traditional farmer. He spent his days chatting up the local farmers and watching them doing their chores in ways that had been handed down by generations. He captured it all on film and left a large heritage of black and white photos taken with his beaten-up Leica M3 camera. The photos make up a large portion of the Beaton archive.

Fortunately, there is a BBC documentary on Ravilious here. It's a lovely documentary and it fits quite neatly into a lunch break. Give yourself a treat this week and watch it.

One of the things that struck me about hearing Ravilious speak about his work is that I'm by no means the first person to be struck by the difficulty of photographing or painting English countryside (Duh!). Turns out that everyone who captures the English (or Welsh or Irish) landscape is challenged by all the greenery. You don't need many colours in your pallette to capture the fields and hedgerows! Green will just about do it. Of course, Ravilious got around all that by photographing in black and white. Suddenly the problem of all that green goes away and you're left with the subject matter, the composition and the light.

When I look at Ravilious' work (see online gallery here), I'm struck by the variety of life on the farm and in the town. These are not dull landscapes of sheep and hedges - they capture the busy essence of a farmer's life before machinery. The images are full of wonderful visual treats - the shadow of a tree juxtaposed with men playing a game on the street or a dog captured inside a frame made by the sides of a shed being moved by a farmer. The images are also full of people, captured with obvious fondness that is echoed back by the subjects.

My only regret is that four of his five books are out of print and quite scarce. A search on Amazon turned up a couple of books priced at $107, so they ain't cheap. Maybe someone will re-publish these lovely books one day.

Friday, February 20, 2009

Going into Hock for Photo Paper

Photo paper has taken on the role that candy bars used to fill when I was a child. I know it's absurd, but if I had a zillion dollars, I'd spend it on fancy paper. The problem is that photo paper is the second most expensive thing on earth (second only to Epson inkjet ink). Let me share with you some costs:

The papers below are all intended for inkjet printers that use pigment inks. They are semi-gloss papers that are designed to look and feel like traditional fibre-based photographs. They have a high d-max, which is another way of saying that the blacks are deep and the highlights are preserved. These papers are frequently touted for black and white photography, but they make colour photos look good too.

The papers typically have two or three layers. The back layer that makes the medium nice and sturdy is either cotton rag paper or fiber (i.e. cardboard) with the nasty lignins removed. Some papers have a middle layer of baryta (barium sulphate), a stable material that gives the print a nice white background without the need for optical brighteners (OBA's) that can fade over time. The top layer is a transparent material that is designed to receive pigment inks and prevent them from soaking into the paper. Here's the rundown on the papers that I've used. Prices are in Canadian dollars, so divide by 1.25 for USD. I've shown 4 prices per sheet for 8.5x11, 11x17, 13x19 and 17x22. Price per sheet is based on the most economic size.

  • Moab Colorado Fiber Satine - This is a Fiber paper weighing in at 245 GSM. It does not have a baryta middle layer. Prices: $2.40, $3.40, $4.40, $6.00.
  • Ilford Galarie Gold Silk - Gold Silk is a lovely paper with a fiber back and a baryta layer. It isn't OBA-free, but OBA levels are relatively low. This is the value leader by far: $1.00, $2.00, $3.00, $4.00. Note that 11x17 is not available, so the best bet is to buy 50 sheets of 17x22 and cut them in half.
  • Hahnemuhle Photo Rag Baryta - This is my favourite paper. It combines the wonderful feel and longetivity of a cotton rag board with the brightness and gloss of a baryta layer. It's also nice and thick at 315 GSM and has no OBA's. See a review of the paper here. It is not cheap: $2.55, $4.75, $7.50, $9.50
  • Hahnemuhle Fine Art Pearl - FAP has an alpha-cellulose (i.e. cardboard with lignins removed) back with a pearl coating. It produces an elegant result. It's fairly thick at 285 GSM. For some reason, it's even pricier than photo rag baryta: $2.60, $5.50, $8.00, $10.00.
  • Hahnemuhle Photo Rag Pearl - PRP has a cotton rag backing with a pearl finish and weighs in at 320 GSM. It has no OBA's so the paper is warm in tone. Again, this is a lovely paper, but is very pricey: $2.60, $4.70, $6.60, $8.80.
  • Inkpress Pro Baryta Warm Tone - I've only recently tried out a sampler and found the results to be excellent. It's comparable to Ilford Gold Silk. However, I was very disappointed with the pricing: $1.49, $2.99, $3.94, $6.12.

Here's the moral of the story. If you are looking for the best value in this style of paper (i.e. alpha cellulose base and pearl/luster finish), then look no further than Ilford Galerie Gold Silk. It's a wonderful paper at a bargain price.

If you feel queasy about alpha cellulose in terms of longevity and would feel better with a cotton rag base, then Hahnemuhle Photo Rag baryta or Photo Rag Pearl are your choices. Both are over twice the price of Ilford Gold Silk.

Here's a good article summarizing many of the papers in the market.

Wednesday, February 18, 2009

Canon 5D Mark II Woes

Canon doesn't seem to be getting a lot of respect these days. First, we had the 1d Mark III fiasco where Rob Galbraith took Canon to task for releasing a very expensive camera with a broken autofocus. Next up, we had the tempest in a teapot over the very funny blog site FakeChuckWestfall. Chuck is the top Canon guy in North America and this site, written by a very knowledgeable Canon "fan", takes Canon to task for all its foibles. Canon tried to get the site shut down (showing a little frustration maybe?), but the author made some minor concessions and the site lives on. It's well worth the read for its take on a major camera vendor that is clearly struggling with a resurgent Nikon nipping at its heals.

The woe that currently assails Canon involves the 5d mark II. This is a camera that ought to be receiving rave reviews and, to be fair, it has had its share of praise. However, the camera seems to be prone to issues. First it was little white dots next to dark shadows and banding at high ISO's. Canon issued a firmware fix. Now it seems to be allergic to moisture. In a recent photo workshop to Antarctica attended by many photo luminaries including Jeff Schewe and Michael Reichmann, there were lots of 5d mark II's on the trip and a quarter of them failed in the damp conditions. We're not talking about torrential rain here, just drizzle. it looks like the mist leaks into the camera and plays havoc with the electrics. Perhaps Canon is channeling Lord Lucas, Prince of Darkness, who designed the electrical systems of many English cars and spoiled many holidays.

To cap it all off, Chris Sanderson, the videographer who works with Michael Reichmann, has penned a first impression of the much-touted video capabilities of the camera and has damned it with faint praise. To quote "For video it's a bit of a stretch."

Personally, I never saw the point of adding all that video capability to a still camera. If I wanted a swiss army knife, I'd buy one. Adding these functions to a very good still camera just adds cost and functionality that can break later. If Canon offered a mark II without video for $500 less, I'd be all over it.

Can Canon fix the 5d mark II recover from its damaged reputation? I must admit that there's a certain fascination in watching the titan struggle and if the price of the mark II dropped as a result of these early teething problems, that wouldn't hurt either.

Wednesday, February 4, 2009

Joys of Winter Photography

I really like taking photographs in the winter. The light, especially in the morning and evening, can be lovely and reflections on ice and snow give it a whole new dimension. Sunrise and sunset are closer to the middle of the day, so you don't have to get up at 5 am to photograph a sunrise. The best part about winter photography is the distinct lack of crowds. You rarely meet tourists in Toronto and vicinity in January and photographers are even rarer.

I just posted a tryptych of winter sunrise photographs in Pbase and here's brief description of the circumstances:

Sunrise on Lake Ice - Haliburton

We were spending New Year's at our cottage near Haliburton, about 150 miles north of Toronto. It was bitterly cold, but the sky was clear and I awoke to find a lovely golden glow on the horizon. I grabbed my camera, put on my woolies and walked along the frozen shore of the lake until I came to a spot that had some interesting rocks and ice in the foreground. I waited patiently for the sun to rise above the horizon and took this shot with a wide angle lens (17-40 mm) and lots of depth of field. The wide angle lens caused the sun ray effect. I did a bit of post-processing in Lightroom to bring out the reflections in the ice.

Sunrise - Shore of Lake Ontario

It was one of the coldest mornings of the year. The thermometer said -20 C and the wind was whipping. But, the sun was shining and as I made my way down the Don Valley Parkway on the way to work, I noticed a bank of clouds over the lake to my south. Thinking that there might be some interesting mist rising from the lake, I drove into the Toronto Harbour disctrict and went to the beach at the end of the harbour road. As you can see, there were interesting ice formations on the shore as well as a bank of clouds and mist sitting over the lake. On this shoot, I had the company of another photographer. He was dressed in a full snowmobile suit and I was in a leather jacket and light pants, so he was obviously better prepared. We both waited for the sun to rise and illuminate the clouds. He was comfortable, I was frozen, but we both waited patiently. The sun rose as expected and the clouds lit up. I snapped a couple of hurried shots with a wide angle lens and lots of depth of field and ran as fast as I could back to my car to try to get some circulation into my frozen fingers.

Sunrise - Farmer's Field near Collingwood

This past week-end, we were skiing in Collingwood, a small town two hours north-west of Toronto. Saturday was very cold and windy, but the forecast for Sunday was for clearing skies and warmer weather. I woke around 7 and put on my full ski gear in anticipation of a photo opportunity. On our way back from town the previous afternoon, I'd spotted a farmer's field with straw bales sitting out in the snow. It presented a rather forlorn scene raising the question as to why the farmer hadn't had time to take in the bales. I drove out to the field in the morning, put on my show shoes after parking in a nearby laneway and walked out to the field. The wind was howling and snow was blowing all around. My footprints were covered in almost as soon as I'd made them. Fortunately, the temperature was up around the freezing mark or I would have packed it in. I waited among the bales for the sun to illuminate the clouds and the snow. It didn't break through the clouds until much later, but it did light up the sky with a lovely morning glow. This scene was also captured with my wide angle lens. I used my new portable grey card (attached to my key ring) and it showed that the dawn light temperature was 12,000 - a value that I'd never have chosen unless I'd had the grey card for evidence. I also used the gradient adjustment in Lightroom to add some saturation to the sky and to bolster the whiteness of the snow. This is exactly as I remember the scene.

Tuesday, February 3, 2009

Art City Part II

Art City Toronto Storefront
I was feeling a bit worried about the second part of my photo class with the students of Art City. In my previous post, I described how I'd volunteered to teach digital photography to a small group of kids from Toronto's St Jamestown district. We had a great time shooting indoors and outdoors using some cameras donated by my friends and I'd taken all the cameras and photo cards home to figure out how we would complete the digital darkroom part of the class.

Still Life
Deborah Harding, who runs Art City, had found a computer lab in a housing cooperative down the street that the students could use, but I didn't have the money to buy a copy of Photoshop for 7 students, so I was looking for some digital darkroom software that was easy to use as well as cheap (or even free). That's when I discovered photoshop.com. If you haven't checked this out, it is really worth your while. Adobe has created a free photo sharing web site that has an excellent photo editor as part of the package. If you are on the look-out for photo editing software for someone who isn't particularly handy with computers, photoshop.com is just perfect.
Student Photographer
It allows you to do all the usual editing stuff (exposure, brightness, saturation etc.) with a very easy interface. For example, if you pick the exposure control from the menu, you are presented with a little slide show of examples of your image in a variety of exposures ranging from dark to light. You mouse over the thumbnails and your image changes to the exposure of the thumbnail. When you see the exposure you like, you click on the thumbnail and the image changes.

I set up 9 accounts on photoshop.com (one for each of the cameras that we used in the workshop) and uploaded all the photos that we had taken.

When the kids showed up on Sunday, we hiked down to the computer lab and I showed them how to sign into photoshop.com and let them get on with editing their photos. They were asked to focus on developing two or three of their best shots that I would print out for them.

Little did I know that photoshop.com had just released a beta of a photo decoration feature that allows you to decorate your images with clip art. One of the kids discovered this feature and from that point on, the class took on a whole new dimension. The Art City students had a wonderful time putting little animals and captions on their photos and the afternoon passed very quickly.
Photo with Decorations
The kids all managed to prepare 3 or 4 excellent photos and enjoyed themselves immensely. I was able to download the photos and printed them off during the following week. I heard that the plan for the next Sunday was to build picture frames for the photos.

All in all, this was a wonderful experience and Deborah and I have decided to have a repeat class in the spring where we'd visit the zoo and take pictures of the animals.

Tuesday, January 27, 2009

Art City Part I

I've had a tremendous amount of fun over the last two Sundays teaching a photography class to 7 students between the ages of 7 and 10. The students were members of Art City, a non-profit storefront art school for the kids of St. Jamestown in Toronto.

I sent out an appeal to all my friends to dust off any digital cameras they had sitting around in drawers and received about a dozen cameras ranging from a Kodak DC-50 of 1997 vintage through to some 3 and 4 megapixel cameras. In all, I was able to donate 10 working cameras to the cause and was able to give each of the students in the class a decent digital camera to use.

I was blown away by how quickly these kids were able to get the hang of these cameras. These kids have grown up in the digital age and they really know their way around tech devices of all shapes and sizes. Pretty soon, they were showing me how to set the cameras up to take movies.

I'd thought about this for a week or so and had prepared a 15 minute talk on the basics of photography (light, subject and composition) complete with illustrations from some good photo books. I used Gaylen Rowell's Mountain Light to illustrate a photographer who placed light above all else. I used the book called Wild, Weird, and Wonderful: The American Circus 1901-1927 as seen by F. W. Glasier, Photographer as an example of a photographer who was obsessed with one subject and I used Ed Burtynsky's book on China to illustrate command over composition. The students were surprisingly attentive and passed the books around with great interest.

After the theory, it was time for practice, so we headed out into the cold winter blast. It was snowing, so the kids had a great time running around taking pictures of the wintery scene. I'd asked them to focus on two things: taking pictures that featured lots of lines (e.g. fence posts, grates, windows) to illustrate how converging lines can be a powerful composition tool and taking pictures of each other. For the most part, the students stuck to the script although the snow started to take a toll on the proceedings as the cameras got wet and started to malfunction. Finally, snow angels won out over cameras and we went back to Art City.


The author poses for portraits

Once indoors, the Art City staff took over the proceedings and organized lots of great photo opportunities. The kids made colourful still life arrangements and took pictures of those. Then we split the group into two with one group modelling for the other. Art City has lots of dress-up clothes, so the kids had a great time modelling crazy fashions. I spent the time either dressing up for the kids or fixing cameras that had mysteriously been set to some very weird combinations of settings.


The models shoot back!

The time flew by and soon it was time to take the cameras back and end the session. I took away the photo cards with every intention of uploading them so the kids could edit them the next week.

Thursday, January 22, 2009

The Transparent City

Contemporary photography is like modern classical music - much of it leaves me scratching my head in bewilderment, but occasionally something really resonates. Lensculture is showing a gallery of work by Michael Wolfe called The Transparent City that really strikes a chord with me. He uses an extremely high resolution camera (over 100 megapixels) to capture voyeuristic shots of people in Chicago high rises (offices and apartments). The people are caught doing mundane things, like sitting in an office chair thinking or mingling at a cocktail party.

Wolfe does a wonderful job of capturing what it means to be a city dweller in the 21st century and communicates the loneliness, the separation from earthly things and the emotional stress that we all feel acutely at times. I particularly found the isolated, pixelated images that he's cropped out of his large images to be poignant because they capture gesture while preserving anonymity. It's very powerful stuff!

If you live and work in the city, you should spin through these images and reflect on what human life has become and where we are all going.

Monday, January 19, 2009

New Printer and Colour Management Part II

True confessions: I was a colour management hold-out. In theory, I drank the cool-aid, but in practice, I could never bring myself to shell out a couple of hundred bucks and go through the perceived hassle of calibrating my monitor.

All this changed when I got my new Epson 4880 printer. I unpacked the printer, went through the set-up routine and loaded the paper for my first test print. Maybe it was a bad omen that the guy who delivered the printer to my retailer cut his finger badly on the crate it came in, but in a fit of optimism I loaded some nice Hahnemuhle Photo Rag Baryta paper into the printer and let it rip. Not being one to read the manual beforehand (or even to look at the paper tray), I assumed that the paper loaded face-up like my trusty R1800 printer did. After producing a very soft print on the back side of the paper, I realized that the 4880 loads face-down. Doh! I ran the paper through again and the print was very dark.

I went back and checked everything: the driver settings (letting photoshop control the settings), the ICC profile for the paper (Hahnemuhle's profile in this case) and I tried it again with the same result. The only way I could work with this printer was to turn down the brightness on my monitor to 20/100. I could barely see the navigation on Lightroom and Photoshop, but at least my prints were turning out the way I could see them on the screen.

I knew that it was time I profiled my monitor and set up my colour management flow from stem to stern. Surprisingly, I found that the price for a decent monitor calibration product had dropped to less than $100, so it wasn't as painful as it seemed. After reading the reviews on this extremely helpful site, I decided to buy the Colorvision Spyder Express 2, even though there is another good product out there called the Pantone Huey. Both are supposed to be extremely easy to use.

The Spyder2 was an absolute breeze to set up. You just install the software, plug in the device and hang it over your monitor, wait a few minutes while it measures the intensity of various standard colours on your screen and, hey presto, your custom ICC monitor profile is done. It even shows you the before/after shots of a standard image to show you how much your colour rendering has changed.

My "after" image was much warmer than my "before". AND, the new profile matched the intensity of my monitor when it was set to the default factory settings. As a result, I can edit my pix at full intensity and rely on Photoshop to convert the image successfully from my monitor profile to my printer profile.

Why did I wait so long for this? It was such a snap!

If you are dithering about colour management and haven't bought a calibration product yet, what's holding you back? You'll spend 'way more money on waste paper than you will on the calibration device. Trust me!